


A while ago, I’ve backed the M5Stack CardputerZero project which aimed at building a Cardputer-version with a Raspberry Pi CM0, i.e. a proper Linux-capable CPU.
The device has now arrived and it is a beauty!
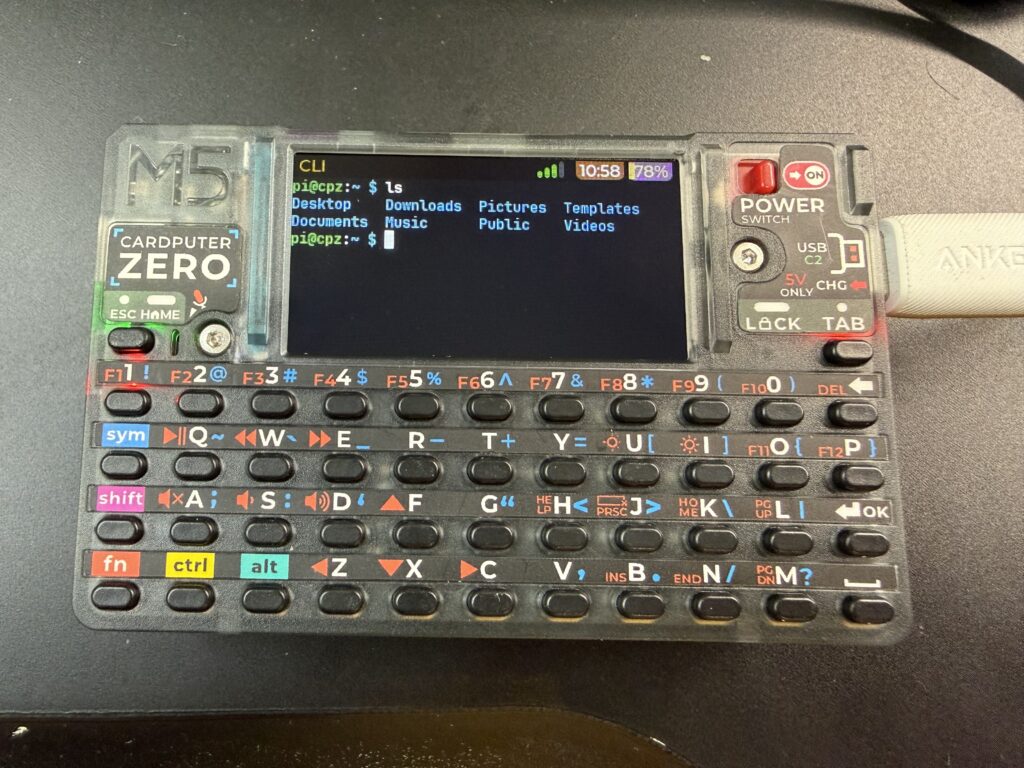
The original firmware boots into a demo/test application to showcase all the various features. If you connect it to HDMI, it will also boot into a graphical environment. (Which takes unnecessary time when you don’t need it.)
My first task was to turn this into a simple Linux machine. Here’s what I did:
Preparations
For easier handling, I went through the onboarding and made sure the CPZ is connected to my WiFi and I can SSH into the thing.
Disable graphical mode
The default is to boot towards the graphical.target which includes launching the X11/Wayland environment. I very much prefer to boot into text mode. This can be configured by changing the default target like this:
sudo systemctl set-default multi-user.targetCode language: Bash (bash)Subsequent reboots were much faster as it didn’t have to load the desktop environment anymore.
Don’t start APPLaunch
Next step was to disable the demo/test application that runs automatically on every boot.
sudo here.systemctl --user disable APPLaunch.serviceCode language: Bash (bash)Don’t show splash screen
There’s a unit called fb_load that redraws the splash screen to the framebuffer during bootup. This had to go, too.
sudo systemctl disable fb_load.serviceCode language: Bash (bash)Enable framebuffer output
The default kernel parameters disable framebuffer output using fbcon=map:off. Let’s change that.
Edit the file /boot/firmware/cmdline.txt, e.g. using vim (don’t forget sudo). Then find above option and change it to:
fbcon=map:0fbcon=map:10 for it to first try fb1 (HDMI output) and then fb0 (internal display). However, since I have set hdmi_force_hotplug=1 in my config.txt (see below), this causes the output to generally go to the HDMI – whether a screen is connected or not. That’s why I’m using map:0 here.While here, I’ve also added consoleblank=0, changed the quiet to verbose and also added nosplash. Also, this might be a great opportunity to change the Wi-Fi RegDom to your country. In my case: cfg80211.ieee80211_regdom=GB.
Keyboard map
The proper keyboard map file is in /usr/share/keymaps/ but only loaded by the demo/test application, not the system. So, after booting with it disabled, you will notice that the blue special characters (to be used with the SYM key) don’t really work. E.g. a forward slash is now SYM+9 instead of SYM+N like it is printed on the device.
To fix this, we need to get the system to load the keymap. Edit the file /etc/default/keyboard and at the end add the line:
KMAP="/usr/share/keymaps/tca8418_keypad_m5stack_keymap.map"Code language: JavaScript (javascript)Once done, run:
sudo setupcon --saveThis will make sure to set this keymap as early in the boot process as possible. It should also apply the changes immediately.
Tweak config.txt
Finally, I’ve adjusted the Raspberry config in /boot/firmware/config.txt to my likings.
I’ve commented out the splash_screen= line so no graphics is displayed at first.
#splash_screen=CardputerZero_splash_custom.binCode language: PHP (php)Also, I’ve lowered the GPU memory from the default 128 MB to only 32 MB:
gpu_mem=32And I’ve also added HDMI forced hotplug so I can connect to HDMI at any time:
hdmi_force_hotplug=1Further optimisations
This is now a great basis for a small pocket Linux machine. Depending on your use case, you might want to thin out the packages. E.g., I personally don’t need all those GUI tools that were installed by default. Instead, I like to manage the device using Midnight Commander (package mc) and Aptitude (package aptitude) instead of the normal apt.
Maybe I’ll try experimenting with different fonts. The smallest default font for the framebuffer is 8×8 which gives 40×21 characters. But there are fonts like Tamzen/Tamsyn, miniwi, or Spleentt that are even smaller. I might need a GameBoy Magnifier, though. Here’s a visual comparison:

I love the amount of characters you can cramp onto that tiny little screen using the “miniwi” font (middle picture). 80×21 is nearly the 80×25 from good old DOS times. And it has box drawing characters, too.
However, my eyes very much prefer Spleentt (first picture) at 64×21 characters.
Third picture is Tamzen which still allows for 64×18.


Reposts
Likes